From the Workshop

December 27, 2009

Window to my workshop -34

 T21 Transitional Plane – Bushing


There are 2 single bushes and 1 pair in this plane.  The bun and the rear handle have one each and a small pair for the adjuster.  Following are a few illustrations to give you an idea of how they are made – once fitted they are invisible though vital.

 53 T21 transitional dovetailed jointer bush

The purpose of these bushes is that they spread the load into a greater contact area.  I use a coarse thread on these which is cut on to both the male metal portion and the female wooden counterpart. These bushes are permanently cemented into position with an epoxy resin.   


51 T21 transitional dovetailed jointer bush

It is possible to break the bond on the metal parts.  When the bushes are cemented in position they are less likely to rotate due to the mechanical properties of the flats you will have noticed in the photographs (in the above photo I am about to cut the flats on to the stud for the front bun, not one of the bushes – but the principle is the same).   However, as during the fixing process the epoxy resin is forced in the fibrous texture of the wood providing an additional mechanical key these will not break down.
(more…)

December 26, 2009

Window to my workshop – 33

T21 adjuster


The adjuster for this plane is of the well known Norris type. As with all my Norris style adjusters they have some revisions.


 20 T21 transitional jointer plane adjuster


21 T21 transitional jointer plane adjuster

In these pictures you can see two small holes which are used to secure the adjuster body.  One of the larger holes is for the rotating nut and the other is an extra hole to assist in work holding when machining (as in the second picture).

  (more…)

Window to my workshop – 32

Gunmetal fittings for T21


 7 T21 Transitional dovetailed jointer plane

This is parting off my spider hub (for want of a better name) from a prepared bar.


8 T21 Transitional dovetailed jointer plane

 Once these are parted off they need to be trued up to the precise length.

  (more…)

Window to my workshop 31

INTRODUCTION TO TRANSITIONAL PLANES – T21


Having made some comments on the instability of wood in infill planes and now that I have successfully made metal planes without infills of my own design;  I felt that there is a sector in the market that looks longingly towards wooden planes.  Having used some wooden planes myself I feel that there is a sweetness in the way that these planes glide which adds to the plane’s charm.  There is the metal plane with a greater accuracy (well some of them) and the smooth operation of the wooden plane.  When you try and put the two together to get an infill plane you can lose the advantages of both types of plane.   This leaves the transitional. 


T21 transitional jointer dovetailed plane


Instead of putting wood into a metal plane, I put metal into a wooden plane.  The advantage here is that I am not interfering with the integrity of the wood.  Of course there is going to be a lot more wear and tear on the wood but any settlement due to differences in environment is easier to deal with. 

 You will find in my designs of this plane that I have kept all the character of the wood and yet introduced the fittings as found on a metal plane (the adjuster and lever cap). 


T21 adjuster


 All these fittings including handles have been thoughtfully integrated into the wooden body.  Items such as handles and adjuster use brass bushes.  I have used brass bushing in these areas rather than using an ordinary wood screw.  This is a considerable leap forward; the wood screw is just one step up from a nail.

T21 front bun bush


I put some pictures up earlier on in the year which are here if you want to look back:  http://www.holteyplanes.com/blog/category/transitional/

December 22, 2009

Skew mouthed mitre plane

Filed under: Specials — Tags: , , , , , , , , — admin @ 8:56 am

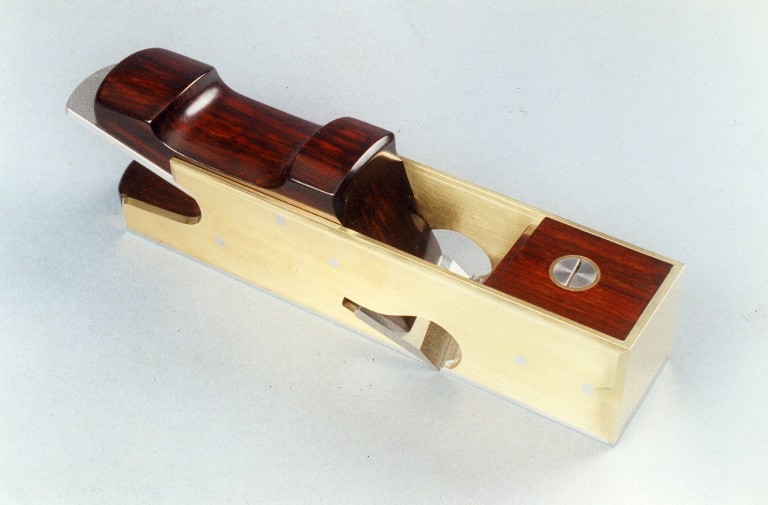
The person who commissioned this plane is no longer with us and I am not sure who owns this plane now.  I did not stamp my name on it as it was not my design.  With the wedge on runners it works well and is comfortable to use.  Now I have dug the photo out it looks better than I remember and there could be possibilies with this design.

skew mouthed mitre plane

A71 Norris Type transitional

Filed under: Specials — Tags: , , , — admin @ 8:55 am

Two copies of a Norris A71 which were commissioned


1 A71 Norris type transitional


2 A71 Norris type transitional


3 A71 Norris type transitional


4 A71 Norris type transitional

December 20, 2009

Window to my workshop – 30

11-sa dovetailed smoothing / finishing plane

I have discovered a few pictures of work in progress, not the complete sequence, so decided to show what I have here.


1 11sa dovetailed smoother finishing plane

 11-sa smoothing plane components before assembly.


2 11sa dovetailed smoother finishing plane

Tapping for adjuster bush after boring.

  (more…)

11-sa Photo Gallery

I have so many nice photos I have decided to put a gallery here for those who are interested.  There is no text just pictures.  It is a shame that the pictures had to be downsized.

24 11sa dovetailed smoother finishing plane

25 11sa dovetailed smoother finishing plane

(more…)

November 5, 2009

Window to my workshop 28

Spiers Style Shoulder plane -4

Apologies for the 4 week gap in postings for those of you who have been following my blog.  I have been a bit busy with visitors (though always welcome it does tend to put me behind a bit), and the new project (transitional plane) keeps on snapping at me;  it is coming along quite well if a bit piecemeal.

 As I mentioned in the last posting that I had mislaid some pictures so here I am going to replace them with some from an A7 Norris type shoulder plane as they are very close in construction.

40 Spiers style shoulder plane

The front infill of an adjustable shoulder plane is probably the most complex infill of all my planes; especially as they are part of the adjuster design.  This infill is integral with the bridge and the clamping screw bush.  The clamping screw bush (which is illustrated in a previous posting) is screwed through the bridge. It also has a shoulder which secures the front part of the infill by clamping down on to a counterbore recess in the wood. This arrangement eliminates the need for a rivet here.  

All the boring, counterboring and tapping is done in a set sequence whilst everything is in situ.  After this process the whole plane is disassembled for further work.  This includes the fixing of the infill to the bridge with the brass bush.  With the fixing secure and complete the brass bush on the underside of the bridge can then be flushed off.  By offering the filling back into position in the plane I can scribe the contour lines from the plane sides for reference for the shaping of the horn detail around the brass bush.  


41 Spiers style shoulder plane

Here the rear end of the shoulder plane is polished before the blade bed is fitted, otherwise it would be inaccessible.  This is typical of the importance of getting the sequence right throughout the whole project.

(more…)

October 4, 2009

Window to my Workshop 27

Spiers Style Shoulder plane - 3


I seem to have misplaced a few pictures along the way here but the blog is only intended as a glimpse of what goes on.


28 Spiers style shoulder plane

At this stage with the plane temporarily assembled I drill through the horn and the bridge with a pilot drill.
(more…)

« Newer PostsOlder Posts »

Powered by WordPress